Takeoff Dataiku Plugin
The Takeoff Dataiku plugin is compatible with versions of Dataiku DSS >= 12.6.2. We also support versions 12.5.x on request.
The plugin allows you to use Takeoff as an LLM within Dataiku, supporting a large number of the features natively available in Takeoff, including:
- Generation & Embedding, including image-to-text.
- RAG workflows
- Structured JSON/Regex generation
- Use of chat templates
Example: using the Dataiku Takeoff plugin to describe images
In this example, we'll setup a simple workflow to demonstrate using takeoff
with dataiku to do some simple AI tasks. First we'll use an image-to-text model to describe some images - each of which contains a saying. We'll then use a text generation model to explain the sayings, and then use an embedding model to embed the sayings. Finally, we'll use a RAG workflow to select which of the embedded texts is being described by the explanation. You can also import a copy of the demo DSS project, available from docs/demo.zip.
Importing a dataset
First, we'll need a dataset. Here's one ChatGPT made earlier:
text,imageUrl
"An apple a day keeps the doctor away, forever and ever", "https://image-examples-llava.s3.amazonaws.com/images/apple_day.png"
"Every cloud has a silver lining in the sky of hope", "https://image-examples-llava.s3.amazonaws.com/images/cloud_silver.png"
"The quick brown fox jumps over the lazy dog", "https://image-examples-llava.s3.amazonaws.com/images/fox_dog.png"
"A stitch in time saves nine in the world of design", "https://image-examples-llava.s3.amazonaws.com/images/needle_thread.png"
"Slow and steady wins the race in the marathon of life", "https://image-examples-llava.s3.amazonaws.com/images/slow_steady.png"
"Time flies like an arrow; fruit flies like a banana", "https://image-examples-llava.s3.amazonaws.com/images/time_banana.png"
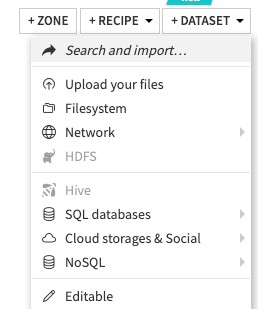
Save it in a file called data.csv. Then, after creating a blank project in DSS, import it from the dropdown menu.
Setting up Takeoff
Before we setup the dataiku plugin, we need to setup the TitanML takeoff server to serve models and respond to requests. We're going to use the Takeoff config file setup to deploy multiple models at the same time, so we can explore all of the plugin's capabilities at once.
Save the following as config.yaml in your working directory.
takeoff:
  server_config:
    port: 3000
    enable_metrics: true
    heartbeat_check_interval: 5
    management_port: 3001
    vertex_port: 3002
    openai_port: 3003
  readers_config:
    reader1:
      model_name: TitanML/llava-1.5-13b-hf-awq
      device: cuda
      consumer_group: image-generator
      max_seq_length: 512
      max_batch_size: 4
    reader2:
      model_name: TheBloke/Llama-2-7B-Chat-AWQ
      device: cuda
      max_seq_length: 512
      consumer_group: generator
      max_batch_size: 4
    reader3:
      model_name: "BAAI/bge-small-en"
      device: cuda
      consumer_group: embedder
Then, after setting up your login for takeoff (described in detail here), run the following command to set your takeoff server running.
Note: you should have at least 24GB of VRAM to run this configuration. If you receive errors about going Out of Memory (OOM), try smaller models, or try deploying the individual models one-by-one. For more information, see supported models. For more information on using AWS to spin up instances with sufficient VRAM, see here.
docker run --gpus all \
    -p 3000:3000 \
    -p 3001:3001 \
    -v ~/.takeoff_cache:/code/models \
    -v ./config.yaml:/code/config.yaml \
    tytn/takeoff-pro:0.16.0-gpu
That container should boot up, running all three models in tandem.
Using the plugin in a Dataiku workflow
You'll need to have the administrator enable
the LLM that the plugin provides. To do this as an administrator, go to the
Administrator page in the dropdown on the top right, and then go to the
connections page. Then add a Custom LLM connection.

In the configuration page, make sure to set the endpoint URL for the deployed takeoff instance, and to choose your plugin as the type.
The dataiku platform treats each model deployed in the Takeoff server as a
model within the Custom LLM connection - one for the embedding model, one for the
generation model, and one for the image generation model. The different
models are identified inside takeoff by
their consumer_group:
internally,
takeoff will route all requests with a given consumer_group to the
model that was deployed with that key. As such, connecting Takeoff with DSS is as simple as providing
the endpoint on which Takeoff is hosted
(http://localhost:3000 if you've been following these instructions),
and the consumer group of the specific model type. For image-to-text, select Chat Completion as the capability.
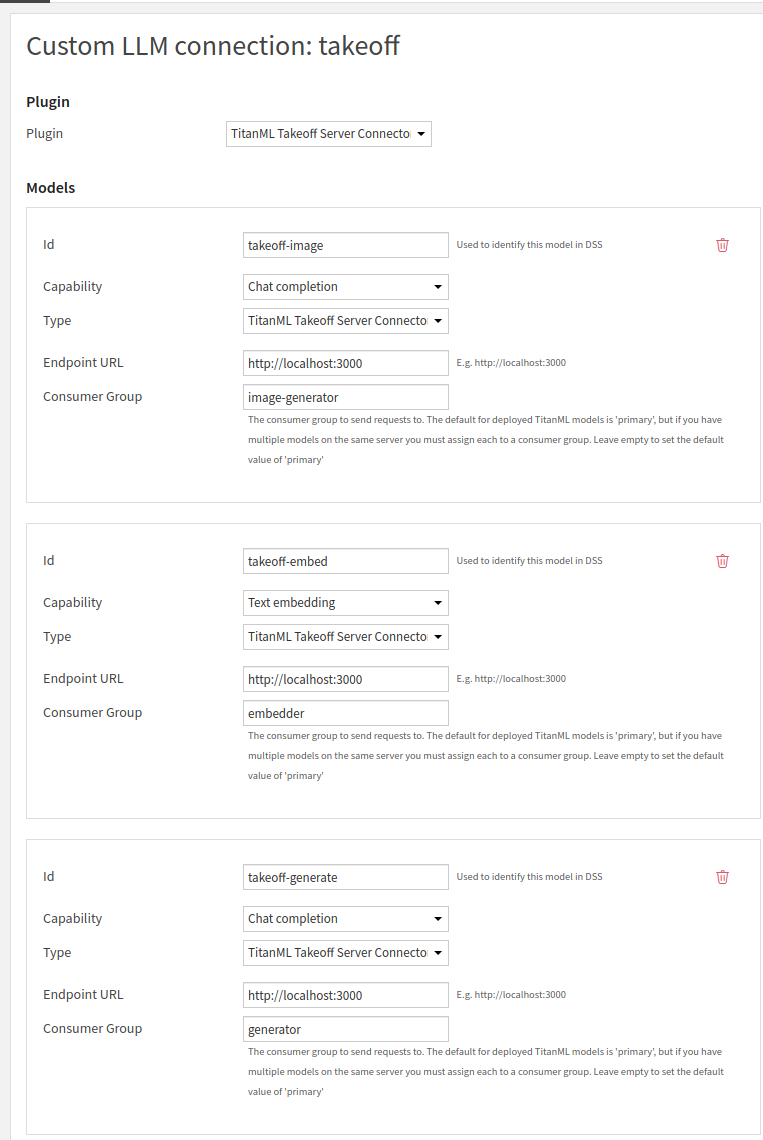
Once you've finished this section - you should have setup 3 dataiku models within a single connection, for use inside your Dataiku flows. On the takeoff side, you've deployed these three language models on the same machine, such that dataiku can address them all individually.
Using these LLMs in a workflow
Image to Text
Coming back to our dataset: we're going to build 3 LLM workflows that
transform that dataset. First, image to text:
 To transform the images in our dataset using the takeoff connection, start
by adding a new LLM 'Prompt' Recipe. This can be found in the sidebar:
To transform the images in our dataset using the takeoff connection, start
by adding a new LLM 'Prompt' Recipe. This can be found in the sidebar:
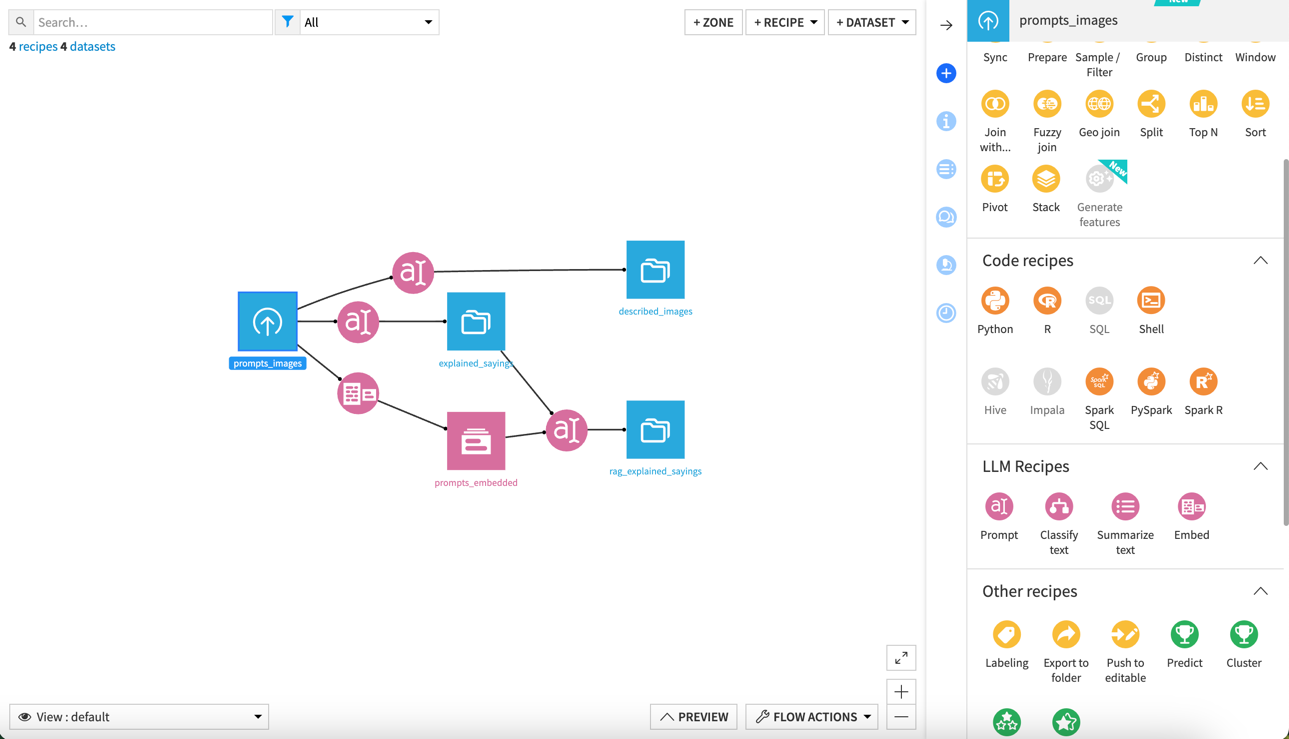 This icon:

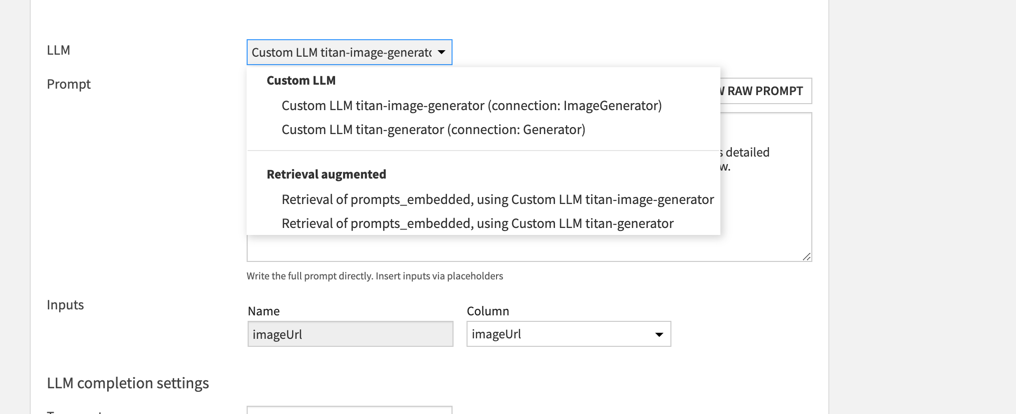
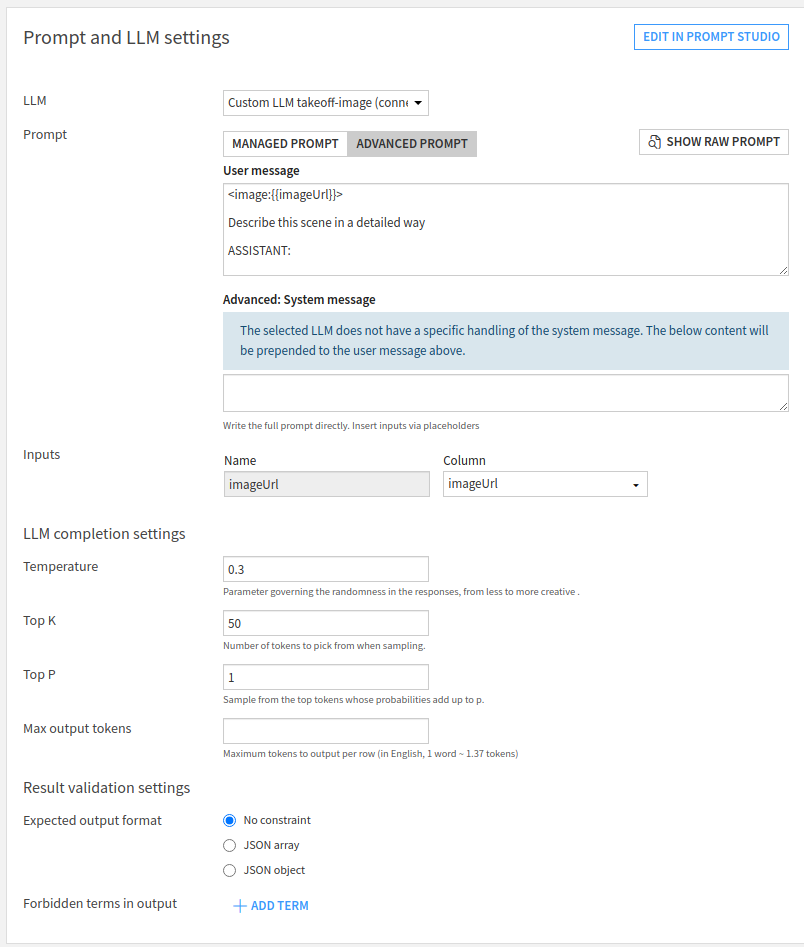
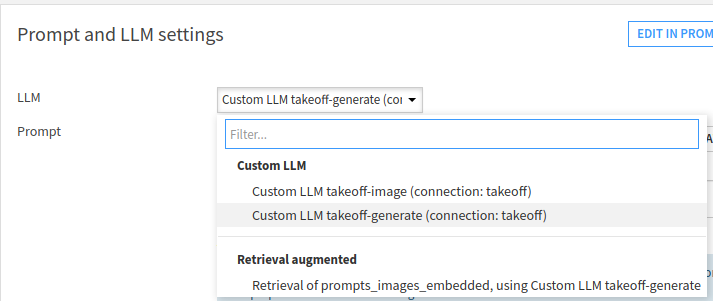
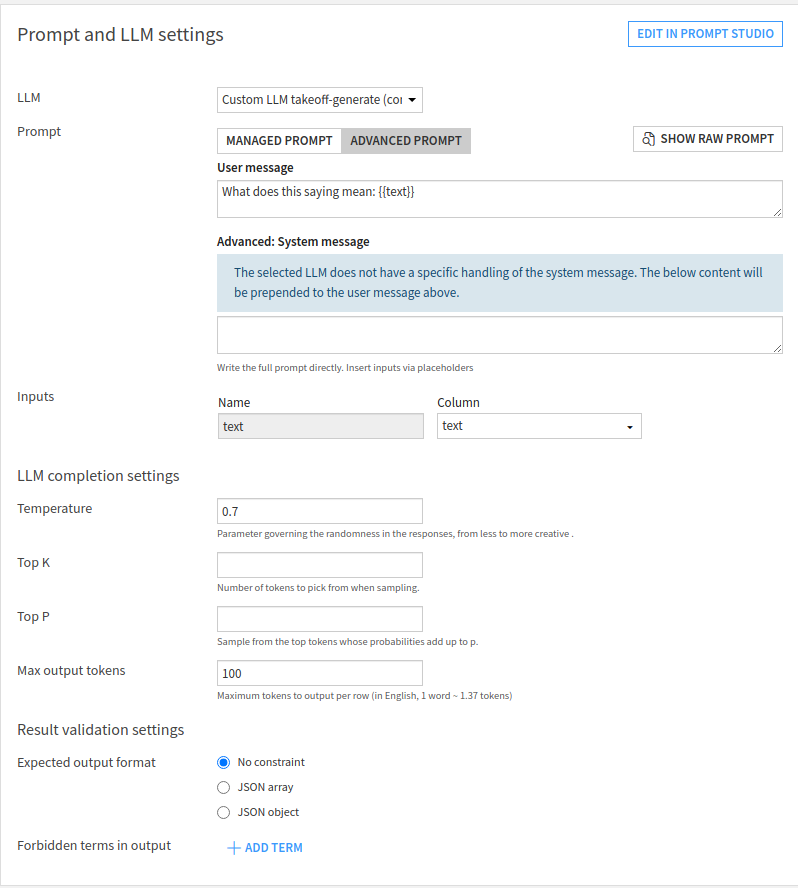
Inside the setup, choose the image generation LLM from the dropdown, and
then choose the "Advanced Prompt" option. Add an image tag to the start of
the prompt: the image tag should be formatted as <image:{{imageUrl}}>,
where {{imageUrl}} is a placeholder for the actual URL pointing to the
image. The rest of the prompt is a description of the task you'd like the
model to perform, including any extra system prompt information you'd like
to feed to the model.
[!NOTE] Image to text is supported only for remote urls (in dataiku) for the moment. A text field in your input should contain a URL pointing to an image to which your takeoff instance has access - for example:
https://fastly.picsum.photos/id/622/200/300.jpg?hmac=HR8-4uUEihkyJx4VczHLFhVvELy7KCD1jm16BABaDy8
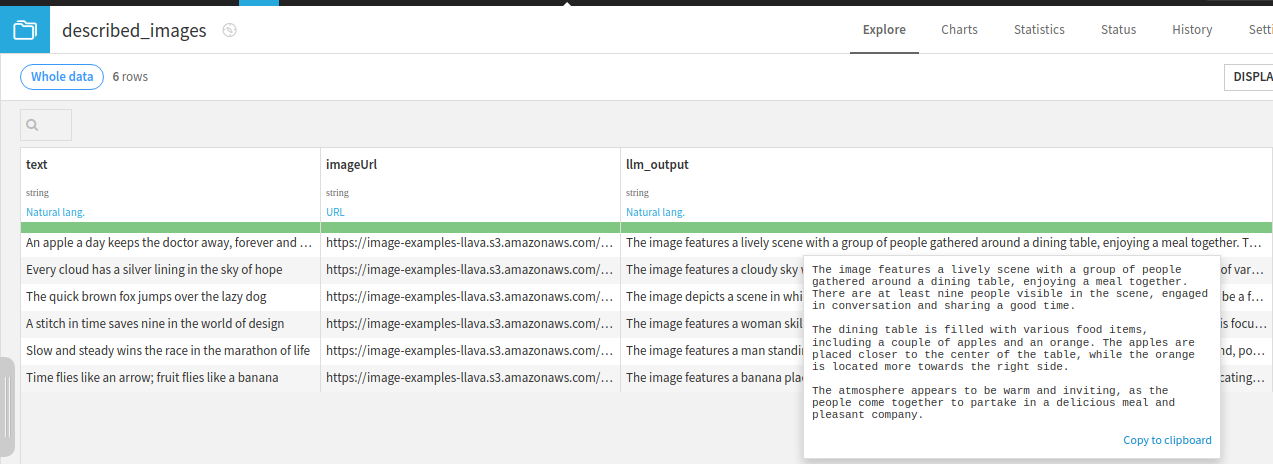
Click the run button on the LLM connection you've just built. It should
begin to create image descriptions of each of the images in your dataset.
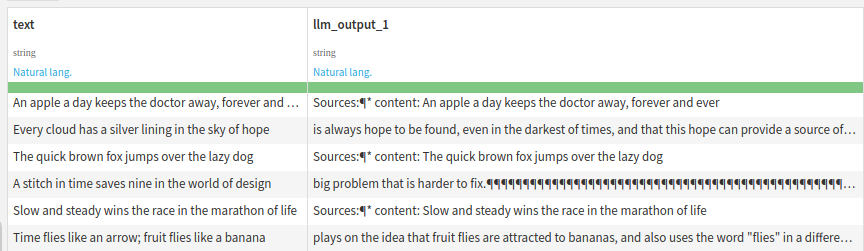
Generating text
Next we'll generate summaries of the sayings in the dataset, using the generative model.
Setup another prompt recipe as before, this time picking the generative model of the Custom LLM
Running this should generate descriptions of the sayings:

Embedding text
Next we'll embed each of the sayings into a vector database. The setup for the embedder also creates the vector database which needs its own code env, which we'll setup first.
Go to the administrator section (see instructions above for setting up a connection), then select the Code Envs tab and press New Python Env.
Setup the environment to use a recent Python version available on your system (e.g. 3.10 on my system).
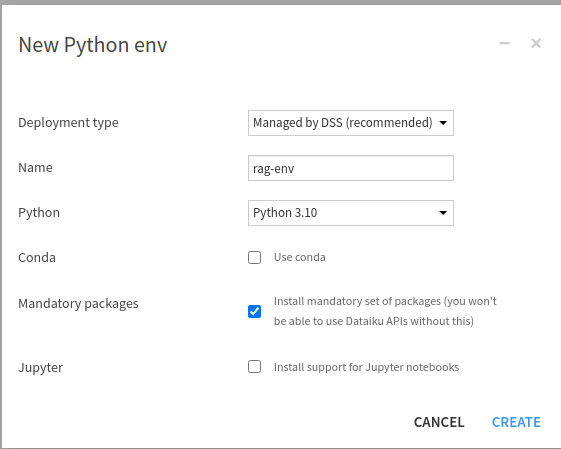
The custom code environment is needed to import the vector database we're going to use. After the env has been created, select Packages to install in the left-hand navigation bar.
As we're going to use the FAISS vector database via langchain, we'll need to request the following packages:
langchain==0.1.0
faiss-cpu
pydantic==1.10.9
Select save and update after entering these to finish setting up your Code Env. If there's an issue with installing, you may have to play around with the selected versions (usually based on your version of Python).
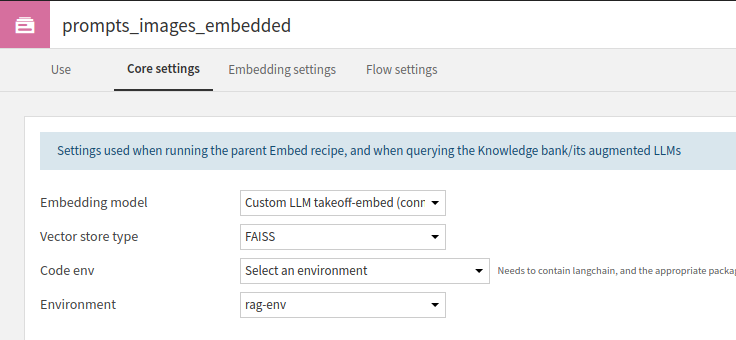
Returning to your flow, we can now use an embed recipe to create the embedder.
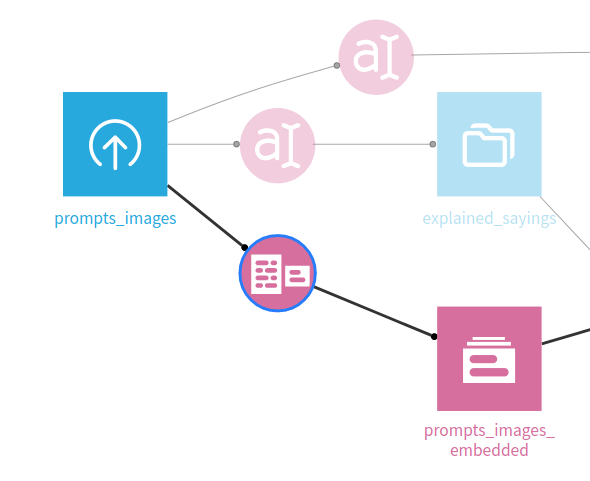
Note here that the Knowledge bank settings will need changing to use our newly setup code env.
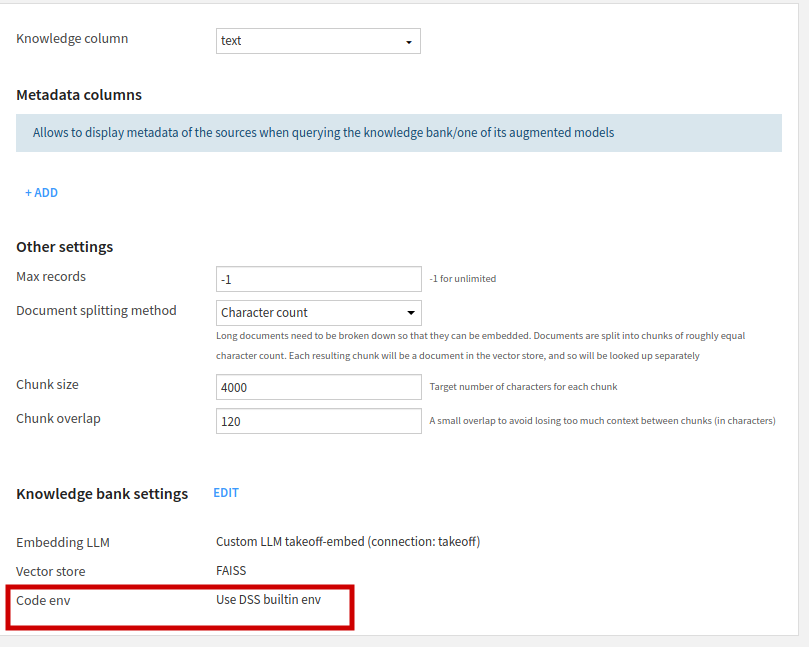
Select edit -> Core Settings and then Select an environment for Code Env and set it to the newly created environment (e.g. rag-env in this example).
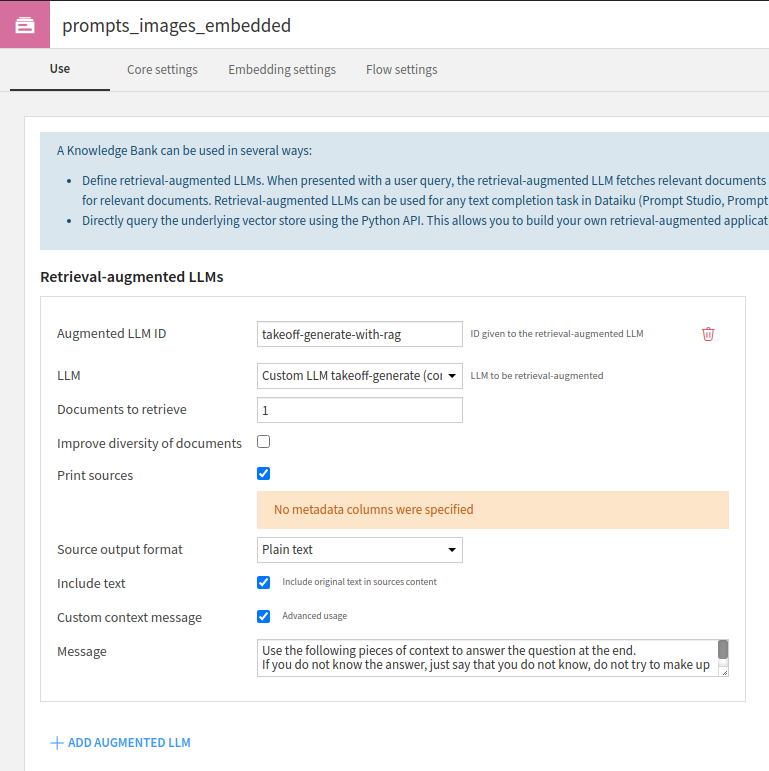
We'll also add RAG functionality to our LLM here; navigating back to the 'Use' page of the Knowledge bank settings, add an Augmented LLM which can make use of the embeddings in generating an output.
RAG workflows
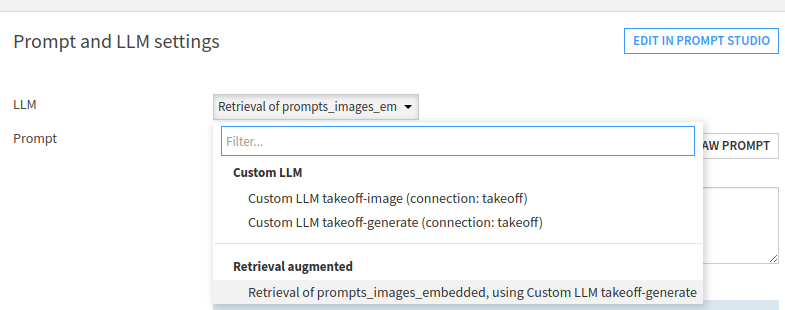
After running the embedder, we can now use this Augmented LLM to create a Rag workflow. Create a Prompt recipe, and then select the Retrieval Augmented LLM we just created.
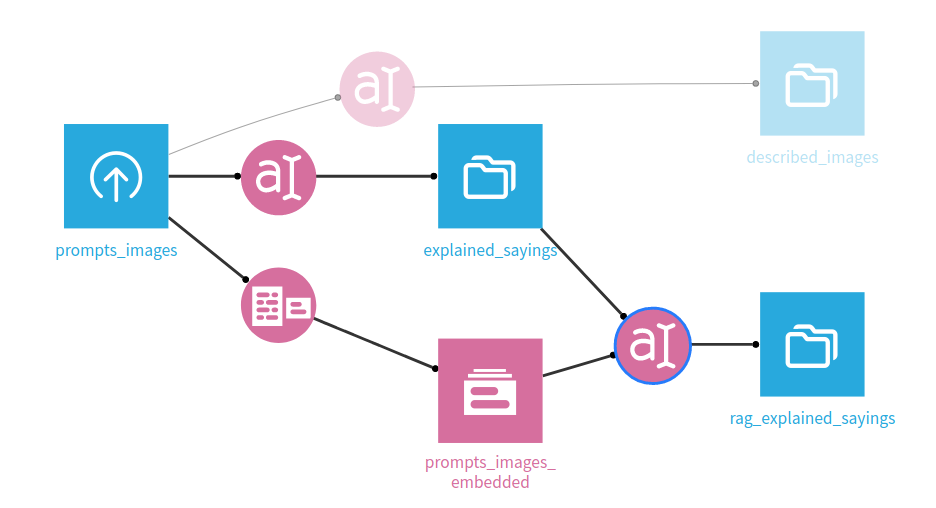
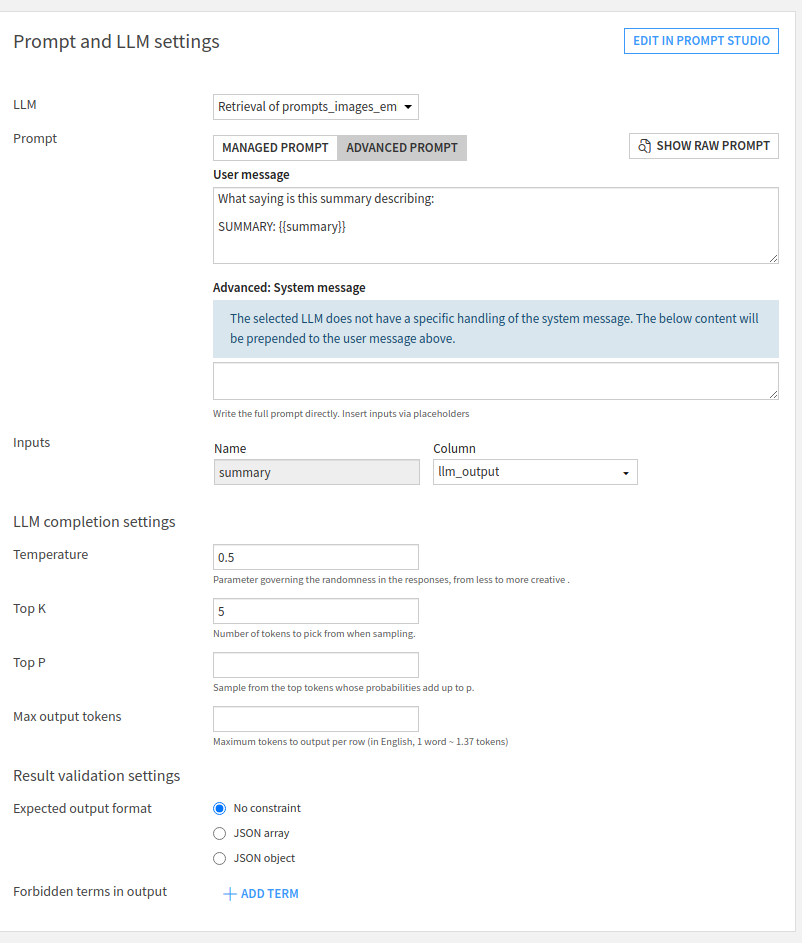
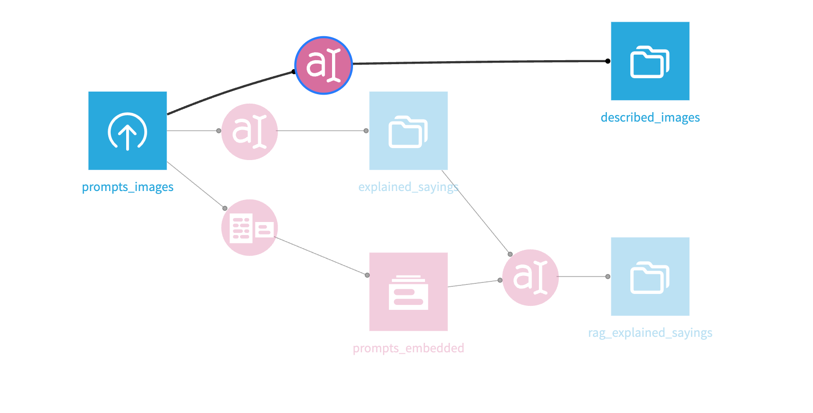
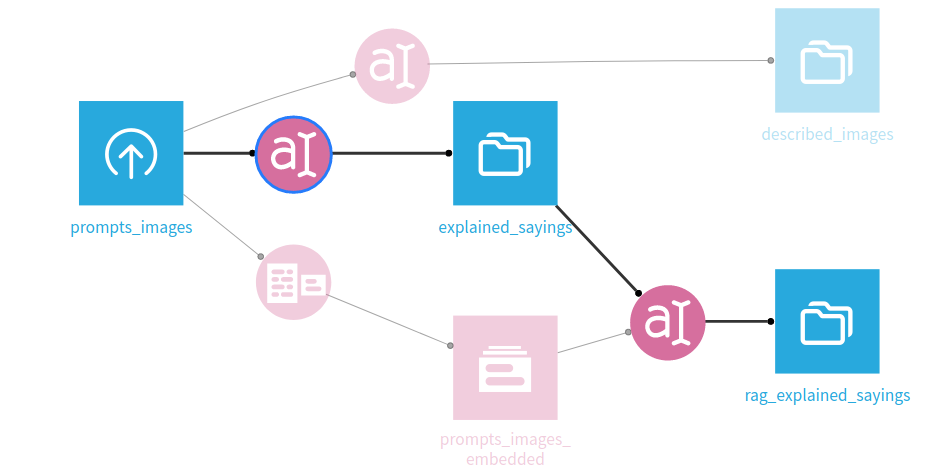
Running the whole flow
You can now run the final generation recipe, and get as output what the model thinks each one was referring to, with some attempts at explaining why. Tweaking the models and parameters used will improve performance here, naturally.
Advanced usage
Generating according to a JSON schema or Regex
Dataiku requires these be set at the connection level, with the schema or regex specified input for a given connection and then applied to every inference made with that model.
It's usually worth making two models, each serving as a generator but with one using the required json schema / regex and one which does not.
See more on choosing a valid schema.
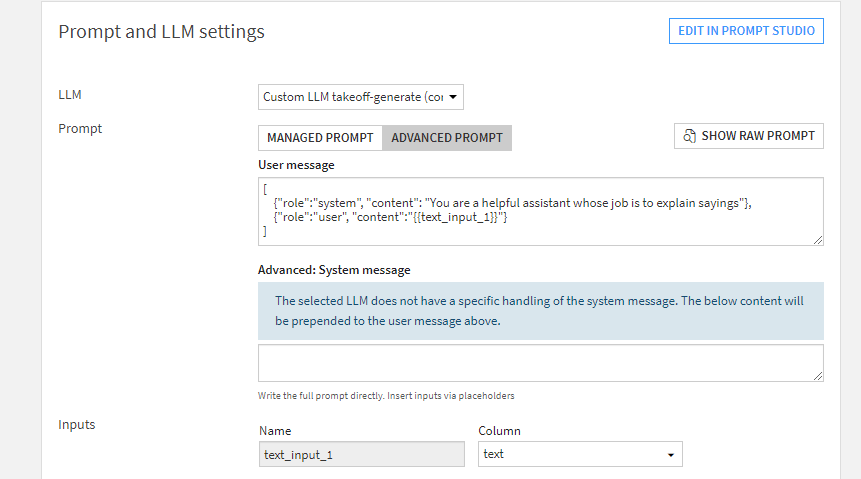
Chat Templates
Our Dataiku plugin also supports the use of chat templates. To configure these, create a recipe with an Advanced Prompt which has a list of messages as the User Message, just as you would pass to the inputs field when using the native chat template endpoint.
An example User Message would be:
[
    {"role":"system", "content": "You are a helpful assistant whose job is to explain sayings"},
    {"role":"user", "content":"{{text_input_1}}"}
]
- The
add_generation_promptargument is not supported through dataiku (i.e. is set to false). - Note that there should not be a comma following the last message; the user message must be strictly valid JSON.
- Note the usual caveats with the chat template endpoint, specifically those around specific models requiring specific roles.