Takeoff in Snowpark Container Service
About
This guide explains how to integrate Takeoff with Snowflake. You'll learn how to push images to Snowpark Container Services and set up a service using a YAML spec file. All the code used in this guide is available here.
Getting Started
Begin by familiarizing yourself with the foundational concepts and configurations required for Snowpark Container Services. A detailed introduction and step-by-step setup can be found in the official Snowflake Quickstart Guide.
Prerequisites
Before you start, ensure you have the following:
- A non-trial Snowflake account with
ACCOUNTADMINrole privileges. - Visual Studio Code installed with the Snowflake extensions enabled.
This setup is essential for managing the Snowflake configurations and executing SQL scripts necessary for the integration.
Step-by-Step Setup Guide
Follow these detailed steps to complete the integration of Takeoff with Snowflake. Each step includes precise actions required to configure and verify each part of the process, ensuring a successful setup. Please refer to the main setup guide for detailed commands and further instructions on executing SQL scripts and managing Docker image within Snowflake.
Step 1: Connect to Snowflake in VSCode
Ensure you have the VSCode Snowflake extension setup and connect to your Snowflake account.
Step 2: Initialize Snowpark Environment
Execute the setup_00.sql to set up the roles, databases, warehouses, and stages required for Snowpark Container Services.
Step 3: Configure OAuth and Compute Resources
Run setup_01.sql to configure OAuth, network policies, and compute resources (GPU).
Step 4: Verify Image Repositories
Use the SQL command below to list your image repositories:
SHOW IMAGE REPOSITORIES IN SCHEMA CONTAINER_HOL_DB.PUBLIC;
Example Output:

- Important: Notice the difference between REPOSITORY_URL and REGISTRY_HOSTNAME:
# example output
REPOSITORY_URL: fqlpbpi-ga70241.registry.snowflakecomputing.com/container_hol_db/public/image_repo
REGISTRY_HOSTNAME: fqlpbpi-ga70241.registry.snowflakecomputing.com
Step 5: Docker Login
Login to the Snowflake repository using the Docker CLI:
docker login <REGISTRY_HOSTNAME> -u <username>
Step 6: Push the Takeoff Image
Tag and push the Takeoff image to the remote repository:
docker tag tytn/takeoff:0.14.3-gpu <REPOSITORY_URL>/takeoff:dev
docker push <REPOSITORY_URL>/takeoff:dev
Step 7: Verify the image Upload
Check if the image is successfully listed in the Snowpark registry:
USE ROLE CONTAINER_USER_ROLE;
CALL SYSTEM$REGISTRY_LIST_IMAGES('/CONTAINER_HOL_DB/PUBLIC/IMAGE_REPO');
Example Output:

Creating a Service with Snowflake
Step 8: Prepare the Spec YAML
Ensure the Snowflake CLI is installed (refer to Snowflake's Quickstart Guide). Push the takeoff-snowflake.yaml file:
snow object stage copy src/takeoff-snowflake.yaml @specs --overwrite --connection CONTAINER_hol
Example Output:

Step 9: Create and Test the Service
Create the service using takeoff_service.sql and verify its status:
CALL SYSTEM$GET_SERVICE_STATUS('CONTAINER_HOL_DB.PUBLIC.TAKEOFF_SERVICE');
CALL SYSTEM$GET_SERVICE_LOGS('CONTAINER_HOL_DB.PUBLIC.TAKEOFF_SERVICE', '0', 'takeoff', 50);
Step 10: Access Takeoff via Ingress URL
Retrieve the service endpoint:
SHOW ENDPOINTS IN SERVICE TAKEOFF_SERVICE;
Example Output:

Now you can use your favourate browser go to the ingress url and try out takeoff!
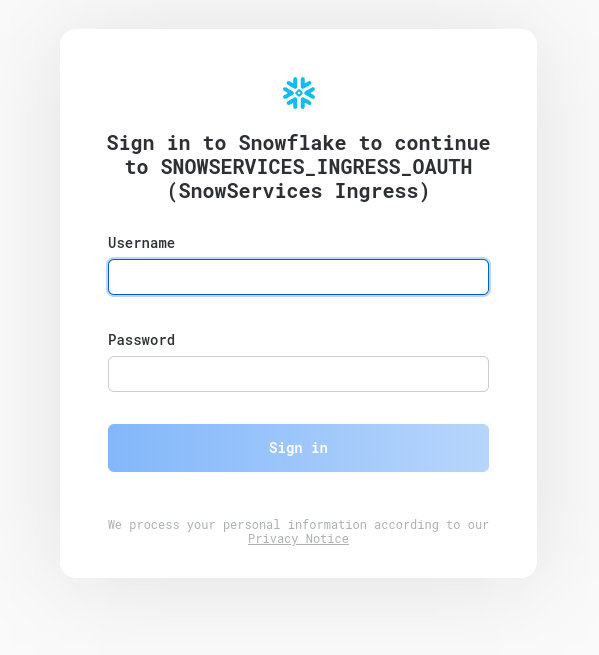
Enter your username and password and then you should see takeoff frontend:
Optional: Use Takeoff in Snowflake Function
For those looking to fully leverage the capabilities of this integration, we offer the option to invoke Takeoff directly from a Snowflake function. We've provided an example in src/test_function.sql to help you get started.
Creating the Function
Create a Snowflake function that calls the Takeoff service by executing the following SQL command:
CREATE OR REPLACE FUNCTION generate (input VARIANT)
RETURNS VARIANT
SERVICE=TAKEOFF_SERVICE      -- Snowpark Container Service name
ENDPOINT='takeoff-snowflake' -- The endpoint within the container
MAX_BATCH_ROWS=5             -- Limit the size of the batch
AS '/generate_snowflake';    -- The API endpoint
Testing the Function
Test the function with the following SQL command to ensure it is working as expected:
SELECT generate(OBJECT_CONSTRUCT('text', 'list three things to do in London')) AS result;
End-to-End Example
For a comprehensive example that includes updating a table using the service API, refer to test_function.sql in the source directory. This script demonstrates how to integrate and utilize the Takeoff API in Snowflake for practical applications.